Last updated: September 10, 2026
Key Takeaways
- The first 24 hours matter because materials keep absorbing and spreading until they are dried or removed.
- Building materials that stay wet for more than 24 to 48 hours can invite mold growth.
- Open exterior windows and doors for 15 to 30 minutes if you are dealing with a non-toxic odor, general dampness, or a food spill.
- It is calling emergency services, the gas utility, poison control, or a hazmat contractor, depending on the hazard.
Move fast, control the hazard, document what happened, and clean in the right order. Those first 10 to 30 minutes often decide whether a spill, leak, flood, or contamination stays a contained mess or turns into a bigger failure. This guide to emergency response immediate cleanup — complete guide is for a homeowner, renter, property manager, or small-business staff member who needs to act now, with basic supplies and no specialized training. It assumes you can tell the difference between a routine cleanup and a scene that needs fire, medical, utility, hazmat, or licensed restoration help.
Who this guide is for — and who should do something else
This applies to anyone facing an emergency that has already started: a burst pipe, a sewage backup, a small kitchen fire, a chemical spill, an appliance leak, a roof intrusion after a storm, or a contaminated area that needs to be made safe within minutes to hours. It assumes you have access to basic personal protective equipment (PPE), meaning gloves, eye protection, and ideally a respirator matched to the hazard; a means to shut off water, power, or fuel if needed; and enough judgment to stop before you make the scene worse.
I am not writing for a situation where people are injured, unconscious, trapped, or exposed to smoke, fire, gas, or a known toxic chemical plume. In those cases, cleanup comes later — if it comes at all. It is calling emergency services, the gas utility, poison control, or a hazmat contractor, depending on the hazard. If you smell natural gas, hear hissing, see arcing electrical equipment, or suspect structural instability, do not stay to tidy up. Leave and get qualified help.
Immediate response, not final remediation, is the scope here. That distinction matters. Limiting spread, documenting conditions, removing the easy contamination, drying or isolating the area, and making the site safe enough for the next step — that is the job. Final remediation may require antimicrobial treatment, drywall removal, duct inspection, mold assessment, or licensed disposal, so consult a qualified professional when the damage is extensive or the material is uncertain. A person who needs to decide whether to keep operating a home, office, or shop after a small incident is the right reader for this article. A person who needs a safe way to handle bulk hazardous waste is not.
For a few categories, there are named standards and agencies that matter. OSHA’s PPE guidance, EPA spill guidance, CDC cleanup advice for sewage and floodwater, and NFPA recommendations for fire scenes exist for a reason. Use the official guidance for the hazard class if you are dealing with any of those hazards, not general cleanup folklore. A good starting point for contamination and flood issues is the CDC’s floodwater cleanup guidance and the EPA’s spill resources. If you are dealing with sewage, the CDC and local public health department matter more than a household checklist.
What should I do in the first 10 minutes?
Start by stopping the source, protecting people, and keeping the hazard from spreading. That order is not negotiable. A wet mop is useless if the water is still pouring in, and a trash bag is the wrong move if the room has an energized outlet in standing water.
Do a quick hazard sweep from the doorway. Ask: Is anyone injured? Is there fire, smoke, gas, sparks, or a strong chemical odor? Is the floor slippery, flooded, or collapsing? Is the spill confined, or is it moving toward drains, HVAC returns, carpets, or neighboring units? If the answer to any of those is yes, act on that threat before cleaning anything.
If you want a mental model, use the “stop, isolate, contain, document, remove, dry” sequence. That is the real job of immediate response. In insurance language, you are preventing a loss from propagating. In plain terms, you are deciding what gets worse if you wait 5 more minutes. And yes, that minute-by-minute drag can snowball fast.
Isolation is the part people miss. Close doors. Keep people out. Turn off a fan that would spread aerosolized contamination. Move pets. Put towels at the threshold if liquid is traveling. If you can safely shut off a water supply, breaker, appliance valve, or fuel source, do that before touching the mess itself. A quarter-turn valve under a sink, a main water shutoff near the meter, or a breaker labeled for the affected circuit can save you hours of cleanup, but only if you can reach it without stepping into danger.
Then document the scene before you move major items. Use your phone and take wide shots, then medium shots, then close-ups of damage lines, labels, and affected materials. Include a ruler, coin, or another fixed object for scale if the issue might become an insurance claim. You do not need a cinematic record; you need a credible one. Five to 10 photos taken before cleanup are better than 50 after the room is already changed.
If the source is odor, gas, or unknown powder, stop and leave. If the source is water, sewage, food residue, or a household spill, continue only if the area is stable and the exposure risk is low.
How do I clean up safely, step by step?
Match the method to the hazard, work from clean to dirty, and remove contamination in stages. That is the sequence below for a small, non-life-threatening incident where DIY response is appropriate.
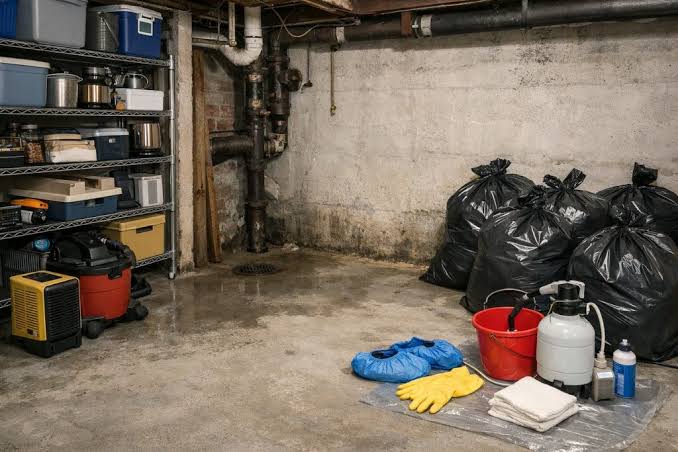
- Put on the right PPE before you touch anything. Use nitrile gloves for general spills, chemical-resistant gloves for solvents, splash goggles for liquids, and an N95 or better for dusty debris or dried contamination. Check that the gloves cover your wrists and that the eyewear seals well enough to block splashes. If gloves tear, goggles fog heavily, or you smell a solvent through your mask, stop and upgrade protection or leave the area.
- Shut off the source and isolate the zone. Turn off the water, power, appliance, or valve if you can do it safely. Close doors and mark the area off with tape or chairs so nobody walks through. Check that the leak, drip, or discharge has stopped or slowed to a manageable rate. If liquid continues to spread after shutoff, the source is not fully controlled and you need a different plan.
- Ventilate only if the hazard allows it. Open exterior windows and doors for 15 to 30 minutes if you are dealing with a non-toxic odor, general dampness, or a food spill. Do not ventilate a suspected gas leak or a scene with unknown fumes in a way that could spread vapor into occupied spaces; evacuate instead. Check that airflow is moving out of the room, not across the building. If odor grows stronger, dizziness starts, or fumes migrate, stop immediately.
- Remove standing liquid or loose debris first. Use absorbent pads, a wet vacuum rated for liquids, a shovel, or thick paper towels depending on the material. Work from the outside edge toward the center so you do not enlarge the footprint. Check that the liquid is no longer moving and that the floor is visible. If the wet vacuum fills fast, the amount is beyond a small cleanup and you need faster extraction or professional extraction equipment.
- Separate salvageable items from contaminated ones. Put cleanable hard goods on one side and porous or heavily contaminated items on the other. Hard plastic, sealed metal, glass, and glazed tile usually clean, but untreated wood, saturated drywall, insulation, carpet pad, and paper products often do not, so consult a professional if you are unsure about salvage. Check that you are not cross-contaminating clean items. If an item smells persistently after cleaning or has absorbed sewage, smoke residue, or a chemical, it may need disposal.
- Wash the surface with the right cleaner for the hazard. For ordinary dirt or food residue, use detergent and water. For biological contamination, use a disinfectant labeled for the target organism and follow the contact time on the label, which is usually measured in minutes. For oily residue, use a degreaser suitable for the surface. Check that the cleaner is compatible with the material and that you can rinse or wipe it away fully. If the surface clouds, warps, corrodes, or sheds color, the cleaner is too aggressive.
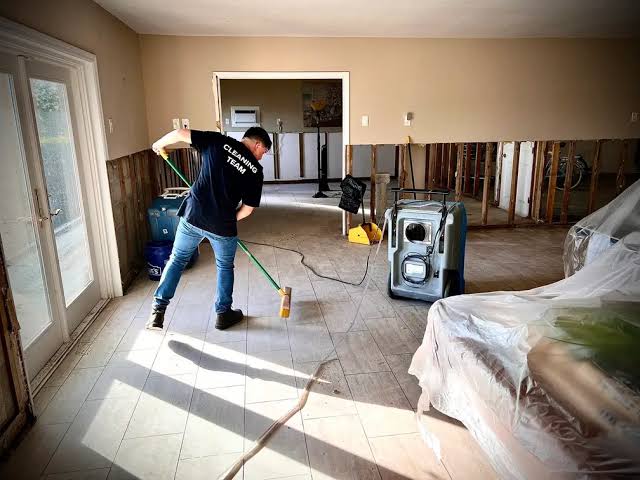
- Dry the area thoroughly. Use towels, fans, dehumidification, or a combination, but do not aim a fan at a contamination source that could aerosolize debris. Aim for complete dryness of visible surfaces within 24 to 48 hours when the issue is water intrusion, because moisture left longer invites mold and material failure. Verify by touch, by looking for no standing moisture, and by checking hidden edges such as baseboards and under cabinets. If materials stay damp past a day or two, the cavity may need opening and professional drying.
- Dispose of contaminated waste correctly. Double-bag small waste if the material is dirty but nonhazardous, and use sealed containers or local hazardous waste rules for chemicals, oils, sharps, or sewage-contaminated items. Check that bags are closed, labeled if needed, and kept away from children and pets. If the waste is regulated, flammable, corrosive, infectious, or unknown, do not improvise disposal.
- Inspect for hidden damage before reopening the area. Check baseboards, under appliances, behind toilets, under cabinets, at outlet plates, and along the first 30 to 60 cm of wall above the floor for moisture, staining, softness, or odor. Verify that electrical fixtures are dry and that no breaker, outlet, or appliance shows damage. If walls sound hollow, floorboards buckle, or odor returns after drying, the problem is not resolved.
A clean result is not “it looks better.” The source needs to be controlled, the hazard contained, surfaces clean enough for normal use, and hidden material either dry or scheduled for removal. Practical standard. Not a cosmetic one.
What you should check before you go any further
Check the hazard class, the material type, and the hidden spread before deciding whether to keep cleaning or escalate. A generic wipe-down is fine for a tipped-over bottle of juice. It is the wrong answer for sewage, fuel, acid, moldy drywall, or fire residue.
First, identify the substance if you can do so without exposure. Read the label. Look for a Safety Data Sheet, or SDS, which lists hazards, first aid, and cleanup instructions for chemical products. If the product label says corrosive, toxic, flammable, oxidizer, or reactive, treat it as a special case and consult a professional or the product’s emergency guidance before proceeding. If you cannot identify it and it is not a harmless household item, stop handling it and seek the product’s emergency guidance or local hazardous waste help.
Second, identify the material that was touched. Hard, nonporous surfaces can often be cleaned and disinfected. Porous materials behave differently. Drywall, acoustic tile, carpet pad, upholstered furniture, particleboard, and insulation can absorb contamination into the structure, so consult a professional if the affected area is large or the material is expensive to replace. That is why “just clean it” often fails. The visible layer may be clean while the core stays contaminated. A sheet of drywall can look normal and still hold moisture behind paint.
Third, check whether the contamination traveled. Water can migrate under vinyl flooring or into adjacent rooms. A spill can reach a floor drain. Smoke residue can spread through HVAC returns. Sewage can wick into baseboards. A small visible patch is not proof of a small hidden problem. The first 24 hours matter because materials keep absorbing and spreading until they are dried or removed.
Fourth, check whether any cleanup action will create a secondary hazard. Scrubbing dried biological residue can aerosolize particles. Spraying water on an electrical problem can make the circuit dangerous. Mixing bleach with ammonia or acids can release toxic gas. Using a household vacuum on glass, ash, or fine powder can damage the machine and spread debris. A correct cleanup is often less dramatic than the instinctive one.
This is where standards help. OSHA’s hazard communication rules, EPA guidance on spill response, and CDC recommendations for contaminated floodwater and sewage all point toward the same idea: identify first, then choose method, not the other way around. If you are uncertain and the material may be regulated, assume it is until proven otherwise.
When should I stop and call for help?
Stop when the scene is beyond a controlled household or facility cleanup, because forcing the issue can expose you, spread contamination, or damage the building. This is the section many people skip, and it is the one that prevents the worst mistakes.
Gas smell or hissing from a line or appliance: This can mean an active gas leak or carbon monoxide risk — leave immediately, avoid switches and flames, and call the gas utility and emergency services.
Any injury, smoke inhalation, unconscious person, or severe chemical exposure: This is a medical emergency — call emergency services first and do not spend time cleaning before care arrives.
Standing water near live electrical equipment, outlets, or breaker panels: This creates shock and fire risk — shut off power only if the panel is dry and accessible, otherwise keep out and call a licensed electrician.
Sewage backup, contaminated floodwater, or fecal contamination over more than a small isolated area: This carries infectious and respiratory risk — isolate the area and use public health or restoration guidance rather than household cleaning alone.
Unknown powder, strong solvent odor, corrosive liquid, or a product labeled toxic, flammable, oxidizer, or reactive: This may be a hazardous material incident — stop handling it and use the SDS, poison control, fire department, or hazmat resources as appropriate.
Smoke damage with visible charring, melted wiring, or persistent acrid odor in walls or HVAC: The issue may extend into cavities and ductwork — document it and bring in fire restoration or an electrician before reuse.
Floor, ceiling, or wall deformation, sagging, or cracks after water intrusion: The structure may be compromised — keep people out of the area and get a building professional or restoration contractor involved.
Mold growth that covers roughly 1 square meter or more, or repeated moisture that you cannot fully dry in 24 to 48 hours: The source is not controlled — correct the moisture problem and consider professional remediation instead of surface cleaning.
A useful rule: if the cleanup depends on opening walls, entering confined spaces, handling regulated waste, or deciding whether a material is contaminated throughout its thickness, stop. The DIY phase has ended.
The mistakes people actually make, and what they cost
The most common mistake is cleaning before stopping the source. That turns a controlled event into a moving one. A burst supply line can refill a room while someone is mopping. Shut off the source first, then clean — that is the correct alternative.
Another mistake is choosing the wrong cleaner for the hazard. Bleach on ammonia-based products can generate chloramine gas. Bleach on acidic cleaners can release chlorine gas. Solvents can damage finishes and spread flammability. Read the label and match the product to the material and contamination type. If the label says not to mix, believe it. Simple as that.
A third mistake is treating porous materials like hard surfaces, and the risk is that people keep scrubbing after the material has already absorbed the contamination. People scrub carpet, padding, drywall, and upholstered furniture because they look salvageable. Often they are not. The result is hidden odor, lingering contamination, and delayed replacement. The better move is to decide early which materials can be cleaned and which need removal.
A fourth mistake is using too much water during cleanup. More water can push contamination deeper into seams, cabinets, and wall cavities. It also increases drying time. The correct alternative is targeted cleaning: damp wiping, spot extraction, and immediate drying.
A fifth mistake is failing to document before cleanup. Once you move items, throw things away, or dry the room, you may lose the evidence needed for insurance, landlord reporting, or warranty claims. Take photos of the source, spread, and damaged materials in the first few minutes, before you change the scene.
A sixth mistake is reopening the area too early because it “looks dry.” Visual dryness is not structural dryness. Wood, drywall, subflooring, and insulation can keep moisture longer than the surface suggests. The consequence is mold, odor, and material failure within days or weeks. Verify with touch, airflow, odor, and, when appropriate, a moisture meter. A moisture meter is a handheld tool that estimates moisture inside materials; it is especially useful after water intrusion, though it does not replace judgment.
What changes in edge cases?
You need a modified approach when the contamination is not simple water or dirt, when the building materials are unusually absorbent, or when the site is still occupied. These are the cases generic advice misses.
For oil, grease, or fuel spills, do not use a lot of water at first. Contain the spread with absorbent material, ventilate only if there is no vapor hazard, and keep ignition sources away. A garage floor spill is not the same as a kitchen sink overflow. Fuels and solvents demand attention to flammability, and some require local hazardous waste disposal even when the spill is small.
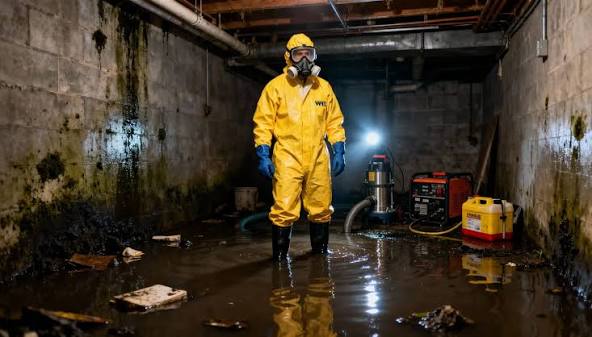
If the incident is sewage, treat it as a biological contamination event and consult public health or a restoration professional when the affected area is more than minor. Wear gloves and eye protection at minimum, avoid aerosolizing the material, and use disinfectants with a verified label claim for the surface and organism class. The CDC and local health departments are better references than general household cleaning blogs. Sewage in carpet pad or drywall often means removal, not just disinfection.
When the damage involves electronics, do not power them on “to check.” Residual moisture inside a device can short components. Unplug, isolate, dry the exterior, and have sensitive equipment evaluated before use. A laptop or control panel that “still works” after a splash can fail later if corrosion has begun.
If the area is occupied by children, older adults, or people with asthma, lower your threshold for stopping. A small odor, dust cloud, or residue that might be tolerable in an empty garage can be a real exposure problem in a bedroom