Last updated: September 10, 2026
Key Takeaways
- Those three facts drive almost every real decision, from a $50 dehumidifier rental to a full mitigation job that runs into the thousands.
- A $300 dehumidifier does not fix a broken pipe, and a $40 fan does not remove moisture trapped in a wall cavity.
- In that scenario, the main expense may be equipment rental for 2 to 5 days, disposal bags, and your own labor.
- A thin sheet of water over 200 square feet can dry faster than a leak that has soaked 12 inches up the wall, depending on airflow, temperature, and material type.
Trying to decide what water damage cleanup will cost? Start with the source, the square footage, and how long the material has stayed wet. That is the honest answer. Those three facts drive almost every real decision in this costs, prevention, and buying decisions — complete guide, from a $50 dehumidifier rental to a full mitigation job that runs into the thousands.
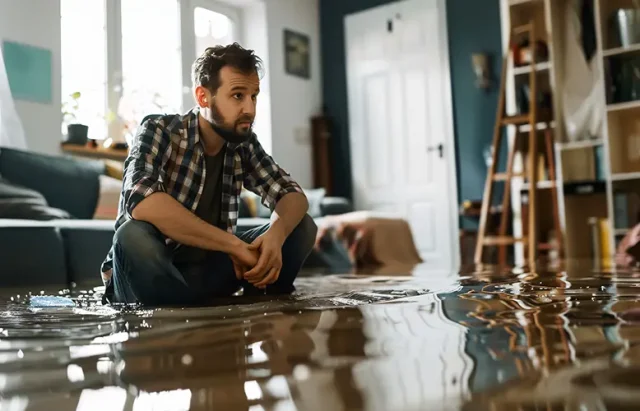
I wrote this costs, prevention, and buying decisions — complete guide for a homeowner, landlord, renter, or property manager staring at a wet floor, a damp wall, a leaking appliance, or a small flood and needing to act fast without making it worse. You probably already know the difference between a spill and a leak. Good. You can shut off water at the fixture or main valve, too. But if water is anywhere near outlets, a breaker panel, gas appliances, or a ceiling that is bowing, the task stops being a “cleanup project” and turns into a safety problem.
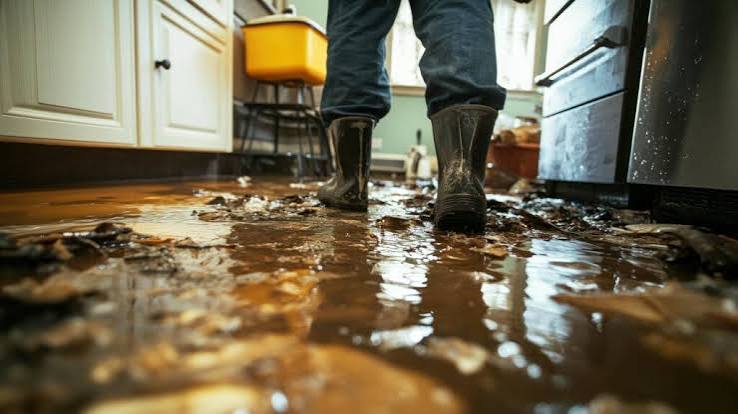
Not every soaked area belongs in the same bucket. A few square feet of clean water on sealed tile is one thing; sewage backup, soaked drywall, or water that has sat for 48 hours is another animal entirely. And I’ll be direct about who should stop: anyone dealing with contaminated water, visible mold over a large area, structural sag, or water in an electrical system needs qualified help, because one bad move can spread contamination, trap moisture inside the assembly, or create a shock hazard. Messy stuff. No shortcuts.
What “costs, prevention, and buying decisions” really means in water damage cleanup

The real question is not “What does water damage cleanup cost?” but “What am I paying for, and when is buying equipment smarter than paying for labor?” In this field, costs fall into three buckets: emergency response, drying and removal, and repair. A cleanup that sounds cheap can turn expensive fast once water gets behind baseboards, into insulation, or under laminate, because hidden moisture is what turns one wet room into a demolition job. The Insurance Institute for Business & Home Safety and the Institute of Inspection, Cleaning and Restoration Certification both emphasize prompt drying; consult a qualified restoration professional for site-specific judgment, and see IICRC S500 and IBHS guidance for general best practices.
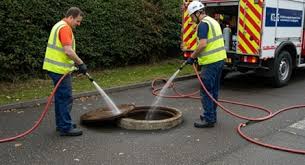
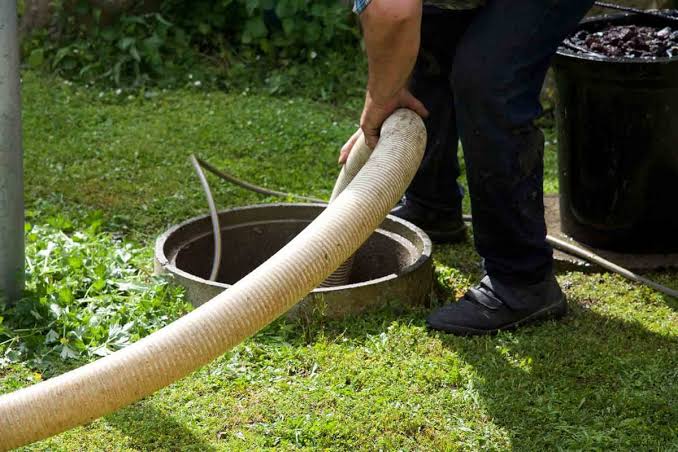
Here is the useful way to think about this costs, prevention, and buying decisions — complete guide. Clean water, small area, quick response? The bill is often mostly equipment and time: wet vacuum, fans, dehumidification, and disposal of ruined porous materials. Once you move into partially soaked drywall, carpet pad, particleboard cabinets, or subflooring, the spending shifts toward labor-heavy removal and the chance of rebuild work. If the source is a sewage line, sump failure with contamination, or a roof leak that has soaked insulation, the price climbs because containment, protective gear, and sanitation join the job. Different job. Different bill.
This is where buying decisions get misunderstood. People ask whether they should buy a dehumidifier, an air mover, or moisture meter first. My take: buy only if you’ll use the equipment more than once or if the job is small enough that rental time would exceed the purchase price, and consult a professional if you are unsure. For a one-off event, renting is usually cheaper. For repeated basement humidity problems, a crawlspace, or a property you manage, ownership can make sense. But a device is not a solution by itself. A $300 dehumidifier does not fix a broken pipe, and a $40 fan does not remove moisture trapped in a wall cavity.
The other thing generic advice misses is the clock. Water removed within hours often means drying and limited material replacement. Leave it for a day or two, and you can get odor, swollen trim, microbial growth, and a much larger bill. That is why the first question is usually about elapsed time as well as the visible puddle. Time is the sneaky part.
How much does water damage cleanup cost?
Water damage cleanup usually costs less when you only need drying and more when materials must be cut out and replaced, and the difference can be dramatic. I can’t give you a universal price because the variables matter too much, but I can give you a realistic cost structure so you can compare bids and avoid paying for theater.
At the low end, a small clean-water incident in one room may involve a few rented or purchased tools: a wet/dry vac, box fans, a dehumidifier, and moisture readings over several days. In that scenario, the main expense may be equipment rental for 2 to 5 days, disposal bags, and your own labor. If you hire a mitigation company, you are paying for speed, documentation, and equipment capacity; the bill can climb quickly once there is a minimum service charge and a crew dispatch. If drywall or flooring must come out, each added step—demo, bagging, haul-off, antimicrobial treatment when appropriate, and rebuild prep—adds labor, so consult a qualified restoration professional before you commit to the full scope.
The biggest price drivers are specific. Category of water matters: clean supply water is cheaper to address than gray water from a washing machine drain or black water from sewage, because contamination changes the process. The amount of wet structure matters more than the amount of standing water. A thin sheet of water over 200 square feet can dry faster than a leak that has soaked 12 inches up the wall, depending on airflow, temperature, and material type. Access matters too. A basement with an exterior walkout is simpler than a crawlspace with low clearance or a wall packed tight with cabinets. On paper, the difference looks small; in practice, it can blow the quote wide open.
If you are comparing quotes, ask what is included. Does the price cover moisture mapping, controlled demolition, daily monitoring, and equipment? Does it include disposal? Is antimicrobial application a line item or part of the package? I would be careful with any bid that sounds low but does not mention documented drying targets. The phrase “drying to standard” should mean a moisture content consistent with unaffected materials nearby, not “it feels dry to the hand.” In restoration work, pin meters, infrared imaging, and psychrometric drying logs are the language of the job.
Buying versus hiring comes down to frequency and complexity. For one event, I would generally rent a dehumidifier and a couple of air movers rather than buy. For recurring water intrusion, owning a quality dehumidifier with a built-in humidistat, a pin-type moisture meter, and a few air movers can be rational. A decent consumer dehumidifier may run a few hundred dollars, while rental often makes more sense for a short job. But if the problem is a structural leak or drainage failure, spending on gear before fixing the cause is wasteful.
One more cost point people miss: secondary damage. Swollen MDF baseboards, ruined underlayment, warped laminate, and odor remediation can cost more than the water extraction itself. If the affected material is cheap and disposable, remove it early. If it is a solid hardwood floor or tile setting, the call is trickier, because aggressive removal can destroy what might have been saved.
How do I prevent water damage from coming back?

Fix the source first. Then control humidity and keep vulnerable parts of the building visible enough to inspect. That is prevention in plain English—part maintenance, part building science, part habit. I would not treat prevention as a single product purchase, because the failure point is usually a weak connection, a clogged drain, a bad seal, or a place where water can sit unnoticed, and consult a professional if the pattern is recurring.
Start with the supply side. Check flexible supply hoses at toilets, sinks, washing machines, and refrigerators. If a hose is bulging, cracked, or older than its expected service life, replace it rather than waiting for a burst. For washing machines, braided stainless supply lines are a sensible upgrade in many homes, but they are not magic; they still need inspection and proper shutoff access. Shutoff valves should be reachable without moving appliances. If you have to pull a washer to reach a valve, the setup is already wrong.
Then look at drainage. Gutter downspouts should discharge away from the foundation, not dump water beside the wall. If the soil slopes toward the house, surface water will keep finding the basement or crawlspace. A common prevention mistake is ignoring a small chronic seep because it looks harmless in dry weather. That same seep can saturate framing after a storm. For basements, a sump pump with a tested float switch and a battery backup is often worth more than a decorative repair. A backup system matters because many basement failures happen during storms when power also fails.
Humidity control matters too. A relative humidity target in the neighborhood of 30% to 50% is a common indoor comfort and mold-prevention range in many climates; you may need the lower end in a cool basement and the higher end in a dry climate. Use a hygrometer, not guesswork. If humidity stays above the target, moisture is coming from somewhere: soil, air leakage, poor exhaust, or a hidden leak.
Ventilation has limits. Running a bathroom fan during and after showers helps, but a fan cannot compensate for a leaking pan, a failed wax ring, or a roof defect. Likewise, caulk is maintenance, not structural repair. I would seal gaps at tubs, sinks, and penetrations, but I would not use sealant as a substitute for fixing a flange, flashing, or cracked pipe.
The last prevention layer is inspection. I like simple routines: look under sinks monthly, inspect the water heater pan, check around the base of toilets for staining, and watch for musty odors after storms. A moisture meter can be useful in known problem spots, especially around exterior walls, below windows, and around appliances. Prevention is often boring. That is the point. It is cheaper to notice a drip in January than to replace a subfloor in June.
What should I buy, rent, or hire for a water-damage job?
You should buy the tools that solve repeat problems, rent the tools for one-time drying, and hire help when the water is contaminated, widespread, or hidden in assemblies you cannot open safely. That is the shortest honest answer in this costs, prevention, and buying decisions — complete guide, and it saves a lot of bad purchases.
For a small clean-water event, the core kit is simple: a wet/dry vacuum for standing water, several fans or air movers to move air across surfaces, a dehumidifier to pull moisture from the air, plastic bags for debris, and a moisture meter to verify that materials are drying. A pin-type moisture meter is usually better than a cheap “scan” meter for comparing one board to another, because it reads directly into the material. A scan meter can help find relative differences, but it is easy to misread. If you buy one tool only, I would choose a moisture meter over a decorative “drying” gadget, because verification matters more than impression.
Renting makes sense when the event is temporary. Many hardware stores and equipment rental counters carry dehumidifiers and air movers. This is the better choice if you need them for 3 to 7 days and do not expect recurring use. It also makes sense if you need a higher-capacity unit than you would reasonably buy for home storage. The drawback is availability: during storms or regional flooding, rental stock may be gone.
Hiring makes sense when the job needs controlled demolition, contamination handling, or documentation for insurance. A mitigation contractor can establish containment, remove ruined materials, place drying equipment, and measure progress. If you are dealing with sewage, a collapsed ceiling, wet insulation, or saturated wall cavities, I would not treat hiring as optional. The labor cost buys you not just hands but sequencing, and sequencing is the difference between drying a structure and locking moisture into it.
Be cautious about buying “miracle” products. Ozone generators, for example, are not a shortcut for proper drying and can create their own hazards if misused. Antimicrobial sprays have a place in some restoration protocols, but they are not a cure for poor source control. The same goes for thermal “moisture removal” tools that sound impressive but do not fit the problem. If the building material is still wet because water is still entering, no machine can outrun physics.
There is also a storage and maintenance cost. A dehumidifier needs drainage management, filter cleaning, and seasonal use to stay useful. Air movers take space. Moisture meters need calibration or at least regular battery checks. If you are not likely to maintain them, rental may be the better buy even over several incidents.
How do I clean up water damage step by step?
Stop the source, remove standing water, open wet materials that cannot dry in place, dry the structure, and verify with moisture readings before you rebuild. That sequence matters because drying the air alone is not enough if moisture is trapped in drywall, subflooring, or insulation.
- Shut off the water source or isolate the area. Turn off the fixture valve, appliance valve, or main shutoff within minutes if you can do so safely. Verify that water stops flowing and that you are not dealing with active runoff from another source. If water continues after shutoff, the problem is upstream, and the job is no longer a simple cleanup.
- Cut electricity to the affected zone if there is any chance water has reached outlets, cords, or equipment. Use the breaker panel and keep out of standing water if you need to reach it. Verify that lights, appliances, and fans in the wet zone are de-energized. If you cannot do this without stepping through water near electrical points, stop and get qualified help.
- Classify the water and the materials. Clean supply water, gray water from sinks or appliances, and black water from sewage require different handling. Verify whether the water contacted carpet, pad, drywall, insulation, cabinets, or structural wood. If the water is contaminated or has soaked porous materials for long enough to cause odor, the cleanup needs removal, not just drying.
- Remove standing water with a wet vacuum or pump. Work in passes of about 10 to 20 square feet so you can keep track of what is left. Verify that water is no longer pooling at low spots, under appliance feet, or in door thresholds. If the vacuum is filling faster than you can empty it or the water keeps reappearing, the source is not truly stopped.
- Remove unsalvageable porous materials promptly. Cut out water-damaged drywall at least several inches above the visible damage line, remove saturated insulation, and pull up carpet pad that has wicked water. Verify that you have exposed the cavity or subfloor enough to let air move. If materials feel swollen, crumble, or smell sour after 24 to 48 hours, they are usually beyond simple drying.
- Set up directed airflow and dehumidification. Place air movers to sweep air across wet surfaces and aim the dehumidifier to maintain a steady indoor drying environment. In practice, that often means running equipment continuously for 24 to 72 hours or longer, depending on the material and climate. Verify progress daily with a moisture meter and by checking the dehumidifier bucket or drain. If humidity does not drop or the meter readings do not trend downward, airflow or containment is wrong.
- Measure moisture against unaffected material, not your sense of touch. Test a dry reference area of the same material and compare it with the affected area. Verify that readings are approaching the baseline of the adjacent dry zone. If only the surface feels dry but the meter still shows elevated moisture in the wall plate or subfloor, keep drying.
- Sanitize only when the water source and material warrant it. Use appropriate cleaning or antimicrobial measures on hard, cleanable surfaces and follow product directions exactly. Verify that residue is removed and surfaces are fully dry afterward. If the area is sewage-contaminated, heavily porous, or you are unsure of the category, do not improvise a cleaner-only solution.
- Rebuild only after moisture is normal and the cause is fixed. Replace insulation, drywall, trim, and flooring in the reverse order of removal. Verify that the leak source is repaired, the cavity is dry, and the material profile matches a dry area. If the repair starts before the assembly is dry, you are sealing in the problem.
Because the practical standard I trust is simple, if you cannot show that the wet material is back to the dry baseline, the job is not done. That is why moisture meters, not just timers, matter. Drying time varies with temperature, airflow, humidity, and material density, and no honest guide can promise a fixed number of hours for every case.
When should I stop and call for help?
Stop when the water is contaminated, the damage is hidden in a structure, or the cleanup crosses into electrical, ceiling, or mold-risk territory. On a water-damage job, the wrong confidence costs more than the service call.
Sewage, toilet backup, or drain water with solid waste: This is contaminated water, not a normal cleanup — stop handling porous materials yourself and use a restoration service or other qualified help. The consequence of pushing ahead is cross-contamination and exposure risk.
Water has reached outlets, a breaker panel, extension cords, or built-in appliances: This is an electrical hazard — shut off power if you can do so without entering standing water, then stop. The consequence of guessing wrong is shock or fire.
Ceiling drywall is sagging, bubbling, or drips when pressed: The ceiling cavity is holding water — evacuate the area below and have the structure assessed before opening anything. The consequence of poking at it is a collapse of wet material on whoever is underneath.
The smell is persistent after 24 to 48 hours and moisture readings stay elevated: Moisture is trapped in wall cavities, insulation, or subflooring — stop relying on surface drying and open the assembly or get a mitigation pro. The consequence of ignoring it is hidden decay and possible mold growth.
Water has been present for more than 48 hours in drywall, carpet pad, or insulation: Porous materials have likely absorbed enough moisture to lose salvage value —