Last updated: September 10, 2026
Key Takeaways
- Cut drywall at least 6 to 12 inches above the highest visible wicking line or water stain.
- A fifth mistake is closing the room too soon because the surface feels dry after 12 hours.
- Cut carpet 12 to 18 inches past visible wetness if the pad is contaminated, and remove pad in full strips.
- The correct alternative is to cut out the wet section at least 6 to 12 inches above the visible stain and replace it.
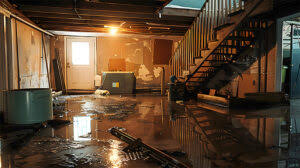
A sewage backup on carpet, drywall, or hardwood is not a “wipe it and wait” problem. It is a judgment call with dirty stakes. The real question is not “Can I clean this myself?” but “What can I safely save, and what has to come out now?” This article applies to a homeowner or tenant facing a limited indoor sewage backup from a toilet overflow, floor drain, broken waste line, or main-line backup, with the assumption that the spill is already stopped and the area is ventilated. I’m not going to pretend every case is DIY. If the backup is widespread, if it has reached HVAC ducts, if electrical outlets are wet, or if anyone in the home is immunocompromised, pregnant, or very young, the job stops being simple sewage backup cleanup carpet, drywall, hardwood floors work and turns into a health-and-building-material decision that usually needs qualified remediation. For practical guidance, the EPA advises treating sewage as a serious indoor contamination issue, and the CDC warns that sewage can contain germs that make people sick. See the EPA’s flood and sewage cleanup guidance and CDC cleanup advice for contaminated water.
What sewage backup cleanup has to accomplish
Sewage backup cleanup carpet, drywall, hardwood floors work has to do three separate jobs: remove contaminated water, remove contaminated materials, and dry what remains before mold has a chance to take hold. The contaminated water is not just “dirty water.” In restoration work it is commonly treated as Category 3 water, the industry term for grossly contaminated water that may contain sewage and pathogens, but if you are unsure what was involved, consult a professional restoration contractor or local health authority. That matters because porous materials that absorb it—carpet pad, gypsum drywall, particleboard base cabinets, insulation—usually cannot be cleaned back to a safe condition in place. That part is the trap.
For a limited backup, the goal is simple: protect yourself, isolate the area, remove salvageable items, then take out the materials that soaked up sewage. Hard surfaces can sometimes be cleaned and disinfected; soft, fibrous, and layered materials are often a loss. A generic article will tell you to “sanitize everything,” which is exactly the wrong instinct. Sanitize is not the same as restore. Drywall wicks moisture upward through the paper face, and carpet pad holds waste like a sponge. Hardwood is more ambiguous: finished planks can often be saved if the water was shallow and the response was fast, but tongue-and-groove seams can trap contamination underneath.
My standard is conservative because the margin for error is small. If the sewage touched carpet pad or the lower edge of drywall, I would plan on removal, not cleaning. If it touched hardwood briefly and the boards did not cup, stain, or separate, I would clean, disinfect, and dry aggressively, then inspect again after 24 to 48 hours for odor, movement, or staining. The EPA recommends removing wet porous materials promptly, and the IICRC S500 guidance is widely used in restoration for deciding what can be cleaned versus removed.
How do I clean sewage out of carpet, drywall, and hardwood floors?
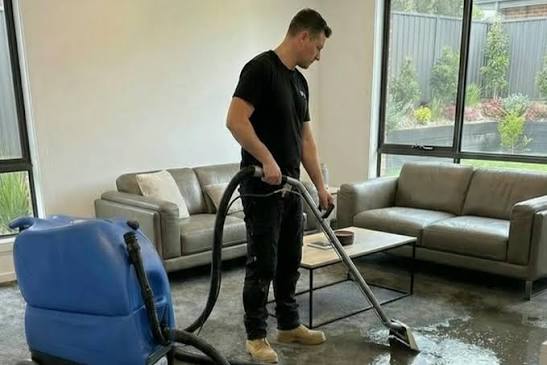
You clean sewage backup cleanup carpet, drywall, hardwood floors by isolating the area, removing contaminated porous materials, and drying the structure before any finish work goes back in. The sequence matters more than the products, and the first hour is the one that changes the outcome most. Miss that window, and the math stops working fast.
- Shut down the source and power to the affected zone. Stop the backup at the fixture or main line if you can, then turn off power to wet rooms at the breaker panel if outlets, baseboards, or cords are involved. Verify that water is no longer entering the space and that no lights, fans, or receptacles in the area are energized. A problem is any repeated rise in water level, gurgling drains elsewhere, or standing water near electrical components.
- Ventilate without spreading aerosol. Open exterior windows if weather allows and place a fan in a window exhausting outward, not blowing across the room. Keep the room door closed. Verify that the odor and humidity are moving out of the space rather than into hallways. A problem is a fan that stirs up splash or sends air toward clean rooms.
- Wear proper protection before touching anything. Use gloves that cover the wrist, eye protection, waterproof boots, and a respirator rated N95 or better if you are disturbing dried residue or dried drywall dust. Verify that skin, eyes, and mucous membranes are covered. A problem is bare hands, open shoes, or cloth masks, which do not protect you from splash or dust.
- Remove standing liquid and sludge. Use a wet-dry vacuum rated for liquid pickup or absorbent pads, then empty waste into sealed plastic bags or a toilet only if local rules allow it. Verify that no liquid remains pooled against baseboards or under furniture. A problem is leaving even a shallow layer behind, because it wicks into carpet backing and drywall paper.
- Take out saturated porous materials. Cut carpet 12 to 18 inches past visible wetness if the pad is contaminated, and remove pad in full strips. Cut drywall at least 6 to 12 inches above the highest visible wicking line or water stain. Verify that the lower edge of drywall is fully exposed and that the carpet pad is not still damp under the tack strip. A problem is trying to “save” pad or drywall that has clearly wicked sewage; odor and contamination remain hidden inside.
- Clean hard surfaces before disinfecting. Wash hardwood, subfloor, framing, and baseplates with a detergent solution first, using disposable cloths or mop heads. Verify that visible soil is gone before you disinfect. A problem is spraying disinfectant onto filthy surfaces and assuming it worked; organic waste blocks contact.
- Disinfect with a labeled product and respect dwell time. Use an EPA-registered disinfectant labeled for sewage or hard nonporous surfaces, and keep the surface visibly wet for the contact time on the label, often 5 to 10 minutes. Verify the label says it is appropriate for the surface and soil type. A problem is wiping it off too soon or using a product not approved for the material.
- Dry to a real endpoint, not “feels dry.” Run dehumidification and air movement for at least 24 to 72 hours, longer if framing or subflooring was wet. Verify that moisture content in wood is returning toward normal and that no cool, damp areas remain behind baseboards or under transitions. A problem is closing the wall or reinstalling flooring while the cavity still holds moisture.
For carpet, the usable question is usually whether the carpet itself is cleanable after extraction. If sewage reached the pad, I would remove the pad and usually the carpet too if it cannot be lifted and cleaned from both sides. For drywall, the answer is usually no once the paper face and lower edge have been wetted. For hardwood, the answer depends on duration, finish, and what is beneath the boards. The EPA’s cleanup guidance for contaminated water and the CDC’s advice for sewage exposure both support removing porous materials that cannot be fully decontaminated. A clean look can fool you.
What should I keep, and what should I throw out?
You should keep only materials that are nonporous, intact, and able to be cleaned on all exposed sides without trapping waste. That usually means hardwood planks, tile, some metal trim, and some sealed solid surfaces; it usually does not mean carpet pad, standard gypsum drywall, fiberglass insulation, or swollen MDF trim. A hard rule helps here: if a material is fibrous, paper-faced, compressed wood, or hollow enough to trap liquid, treat sewage exposure as a removal event, not a cleaning event, but consult a professional if you are unsure whether a material can safely be cleaned or contains hidden layers. No gray zone magic.
For carpet, I would separate three pieces: the carpet face, the pad, and the tack strip. The pad is the first thing to go. If the carpet was only splashed at the edge and not soaked through, it may be salvageable after hot-water extraction, cleaning, and disinfection, but the backing tells the truth. If the backing is wet or stained, the carpet has likely held contaminated moisture. The tack strip is a judgment call; if it sat in wastewater, replacement is cheap compared with risking odor later.
For drywall, the lower 2 to 4 feet of a wall is often the sacrificial zone in a sewage event because the paper face and gypsum core absorb water fast. If the baseboard line is wet, if the wall is soft, or if you can see a wick line, I would cut higher than the visible stain. A generic “dry it out” answer misses the hidden paper layer behind paint. Paint does not waterproof gypsum board.
Hardwood is the most salvageable and the easiest to ruin. I would keep finished hardwood only if the boards are flat, the seams are not raising, and the water was removed quickly. If the boards are cupping, crowning, or separating, or if black staining appears near seams over the next 24 to 48 hours, the contamination may be under the flooring or in the subfloor. That is no longer a simple surface-cleaning job.
When should I stop and bring in a remediation crew?
You should stop when the backup is larger than a contained room, has entered the wall cavity or HVAC, or has contaminated materials you cannot remove without opening the structure. That is not overcaution; it is the point where drying, containment, and disposal become the main job, not cleaning. Different mission.
More than one room is affected: The contamination has spread beyond a single contained area — stop the DIY cleanup and get a restoration contractor or plumbing company involved, because the affected square footage is too large for casual drying and disposal.
Sewage has reached forced-air ducts or returns: Air movement can spread contamination through the system — shut the HVAC off at the thermostat and avoid restarting it until the ductwork has been inspected and cleaned.
Drywall is soft above the baseboard or insulation is wet: The wall cavity has likely wicked contamination beyond what you can see — cut and remove affected materials or hand it to a remediation crew that can open, dry, and verify the cavity.
There is visible mold, a strong persistent odor after drying, or black staining at seams: The event has already moved beyond fresh cleanup — stop reinstalling finishes and investigate hidden moisture or trapped contamination before closing anything back up.
Electrical outlets, appliance cords, or junction boxes were wet: This is an electrical hazard as well as a cleanup issue — keep power off and have the affected circuit checked before anyone works in the area.
The sewage came from a main-line backup, not a clean fixture overflow: Main-line events are harder to contain and usually more contaminated than a localized toilet spill — if that is what happened, consult a professional and treat it as a larger remediation job, especially if the backup recurred after pumping or plunging.
If the affected area is small and the water never reached inside walls or mechanical systems, DIY cleanup can make sense. If you are deciding whether to remove a strip of drywall or a whole wall section, I would choose the larger removal, not the smaller one. The cost of a few extra square feet of board is lower than the cost of trapping sewage in the wall.
The mistakes people make with sewage on floors and walls
The biggest mistake is trying to clean carpet pad instead of removing it. The consequence is odor, lingering contamination, and mold under the carpet even after the top looks fine. The correct alternative is to cut back the carpet, remove the pad, and inspect the subfloor.
A second common mistake is scrubbing drywall and repainting over it. The consequence is that the paper face stays contaminated and the wall may smell for months. The correct alternative is to cut out the wet section at least 6 to 12 inches above the visible stain and replace it.
A third mistake is using a household deodorizer or scented cleaner as if it were a disinfectant. The consequence is a room that smells better but still contains waste on porous surfaces. The correct alternative is a detergent cleaning first, then an EPA-registered disinfectant with proper dwell time.
A fourth mistake is flooding hardwood with extra water during cleaning. The consequence is board cupping, swollen edges, and moisture driven into seams and underlayment. The correct alternative is damp cleaning with minimal liquid, then controlled drying and moisture checks.
A fifth mistake is closing the room too soon because the surface feels dry after 12 hours. The consequence is hidden moisture in framing, subfloor, or drywall. The correct alternative is to keep drying for 24 to 72 hours and verify with a moisture meter if hardwood or wall cavities were affected.
A sixth mistake is ignoring baseboards and transitions. The consequence is that sewage stays trapped where carpet meets trim or where flooring meets a threshold. The correct alternative is to pull trim where needed and inspect the edges before rebuilding.
What changes if the floor is hardwood, engineered wood, or laminate?
The standard cleanup changes because the layer structure changes, and the wrong response can ruin a floor that might otherwise have been saved. Solid hardwood is the most repairable. Engineered wood has a plywood or fiber core that can swell, delaminate, or cup faster. Laminate is usually the least forgiving because its fiberboard core swells quickly when sewage reaches the joints.
On solid hardwood, I would focus on fast extraction, cleaning, and dehumidification. If the finish is intact and the boards are stable, surface contamination can often be managed without full replacement. On engineered wood, I would be more suspicious of edge swelling and seam failure, especially if the planks were installed as floating floors. A floating floor can trap moisture underneath, so the top may dry while the underlayer stays wet. Laminate is often a removal job once wastewater has entered the joints, because the core tends to swell even if the top layer looks unchanged.
If the floor has radiant heat, the drying plan changes too. Heat can speed surface drying while hiding dampness below. I would keep heat moderate rather than blasting it, and I would not reinstall trim or underlayment until moisture readings have stabilized. If the home has nailed-down oak over a crawlspace, the crawlspace should be checked for contamination and moisture, because what looks like a floor problem can become a subfloor and joist problem.
How do I know the cleanup worked?
The cleanup worked when the room is clean, the materials that should have been removed are gone, and the remaining structure is dry enough that it no longer smells musty or sewage-like after 24 to 48 hours. For a hard result, I want three things: no visible residue, no soft material left in the affected zone, and no rising moisture in wood or wall cavities.
A practical endpoint is this: the subfloor or framing is dry to the touch, hardwood is flat and stable, drywall edges are cut back to clean material, and the room can sit closed for a day without the odor returning. If you have a moisture meter, compare affected wood