Last updated: September 10, 2026
Key Takeaways
- If water is still moving in after 10–15 minutes, the problem is not cleanup yet; it is source control.
- Aim for stable conditions over 24–72 hours, not just a quick blast.
- Use a wet/dry vacuum, pump, or truck-mounted extraction if available; remove as much free water as possible within the first 1–2 hours.
- If you keep equipment running without measurable progress after 48 hours, look for a missed pocket of water, a hidden leak, or materials that need removal.
Cleanup process and restoration means removing contamination, drying the structure, and then putting the space back together without trapping moisture or spreading spores. A water-damaged room, basement, attic, or crawlspace does not get safer by accident; the work starts with the source of the water, not with bleach or paint. For a 2026 homeowner, landlord, property manager, or facilities lead, the basic sequence is blunt: control the source, remove water, dry the assembly, verify moisture, and rebuild only after the structure is stable. Simple. Not easy.
Who this guide is for — and who should do something else
This guide is for a homeowner, landlord, property manager, or facilities lead who needs to understand a real cleanup and restoration job after a leak, overflow, condensation problem, or storm intrusion. I’m assuming you already know the obvious part: standing water must go, wet materials cannot stay wet, and anything with active growth needs more than a surface wipe. I’m also assuming you can tell the difference between a damp wall and a soaked one, and that you can use basic tools like a wet/dry vacuum, fan, dehumidifier, utility knife, and moisture meter.
Not every job belongs in DIY territory. A small, contained area — say, a few square feet of wet drywall from a plumbing leak caught quickly — is often manageable for a careful homeowner. But once the damage is larger, hidden, or tied to contaminated water, I would stop short. Category 3 water, the term used in restoration for sewage, floodwater, and other grossly contaminated water, changes the job completely; consult a qualified remediation professional and follow current guidance such as the CDC’s flood cleanup advice or the EPA’s mold cleanup resources. The same warning applies to structural damage, electrical risk, or mold that has spread inside walls, ceilings, or HVAC components. In those cases, the right answer is qualified remediation and restoration, not a bigger bottle of cleaner.
I’m also not writing for cosmetic cleanup alone. Old, dry staining with a sound substrate follows a different path. Here, the question is how to move from wet and damaged to dry, clean, and stable without sealing in a problem that shows up again in 30 days.
One benchmark comes from the ANSI/IICRC S500 standard for water damage restoration, which is the industry reference many professionals use. You do not need to memorize it, but “dry” means dry enough for the material and assembly, not merely dry to the touch. A stud wall can feel fine at the surface and still hold moisture in the cavity. Sneaky stuff.
Take this point if you remember nothing else: the cleanup process runs in order — source control, water removal, drying, removal of unsalvageable materials, cleaning, verification, and reconstruction. Skip the first two, and the last four wobble.
What counts as cleanup, and what counts as restoration?
Cleanup removes the contamination and the water. Restoration rebuilds what had to come out. Those are not interchangeable, and a lot of bad jobs start when someone tries to do restoration before the cleanup is complete.
In practical terms, cleanup is the part of the job that makes the area safe to work in again: stop the source, extract standing water, bag debris, remove damaged porous material, clean remaining surfaces, and dry the assembly. Restoration begins once the materials left in place are clean, dry, and stable enough to close back up. That can mean replacing drywall, insulation, baseboard, flooring, trim, cabinets, or sections of subfloor. It can also mean refinishing and repainting after moisture readings are back in range.
The term I use most often is psychrometric drying, which means controlling temperature, humidity, and airflow together so water leaves the structure at a predictable rate. It is not just “put a fan on it.” A fan without dehumidification in a humid basement can move wet air around and slow drying. A dehumidifier without enough air movement can leave pockets of moisture trapped behind trim or inside a wall cavity. That math stops working fast.
A generic article usually gets this wrong by treating all water damage like a surface-cleaning problem. That is how people end up sealing wet materials behind new paint, flooring, or paneling; if you are unsure whether the assembly is dry, consult a restoration professional and verify with a moisture meter rather than relying on appearance alone. If the wall cavity still has elevated moisture, the damage continues out of sight. In restoration, hidden moisture is the enemy, not the smell.
Cleaning and sanitizing are not the same thing, either. Cleaning removes soil and contamination. Sanitizing lowers microbial load to a safer level on suitable surfaces. Disinfecting uses a product with a labeled claim against specific organisms under specific conditions. Those are separate ideas. A product labeled for one is not automatically right for the others. Follow the label and the material, not the marketing.
A good restoration plan also separates salvageable from unsalvageable material. Nonporous surfaces such as metal, sealed tile, and some plastics can often be cleaned and dried. Porous items such as saturated drywall, insulation, carpet pad, and swollen particleboard usually do not recover well once they have been soaked long enough to delaminate or hold contamination. The decision is not sentimental. It is structural and hygienic.
How does the cleanup process work from start to finish?
The cleanup process works best when you move in a strict order: stop the source, remove bulk water, remove damaged material, clean the remaining structure, dry it, verify it, and then rebuild. That sequence matters more than the tool list, and it is the difference between a job that closes and a job that comes back. Cleanup process and restoration jobs that follow this order are easier to document, easier to dry, and easier to rebuild.
- Shut off the water or isolate the source within minutes. Close the main supply valve, shut a branch valve, stop appliance feed, or cover the intrusion point if weather is the cause. Verify that the active leak has stopped and no new water is entering. If water is still moving in after 10–15 minutes, the problem is not cleanup yet; it is source control.
- Make the area electrically safe before you step into standing water. Turn off power to affected circuits at the breaker if outlets, cords, or appliances are in the wet area. Verify that you will not be working around energized equipment or submerged outlets. Any sparking, humming, breaker tripping, or warm outlet cover is a stop sign.
- Document damage before removal. Take dated photos and notes of affected rooms, materials, and visible staining or swelling. Verify that you have a record for insurance, landlord reporting, or scope planning. If you skip this and later remove everything, you lose the evidence of what was damaged and why.
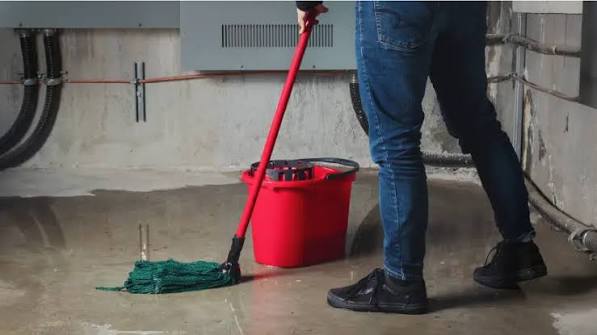
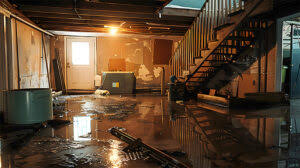
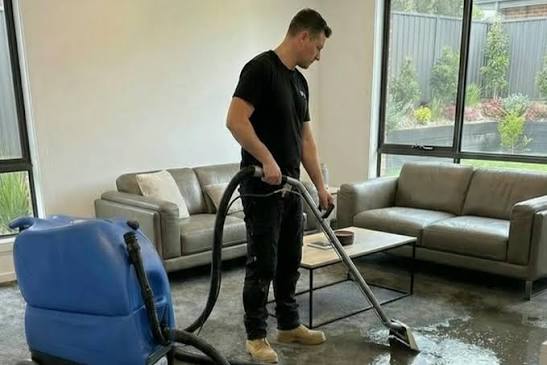
- Extract standing water immediately. Use a wet/dry vacuum, pump, or truck-mounted extraction if available; remove as much free water as possible within the first 1–2 hours. Verify that water is no longer pooling and that carpet, pad, subfloor, and base of walls are not still saturated at the surface. If water returns after extraction, there is still a source or a trapped pocket.
- Remove unsalvageable porous materials. Cut out wet drywall at least several inches above the visible water line, remove soaked insulation, and discard swollen particleboard or delaminated laminate as needed. Verify that what remains is structurally sound and exposed enough to dry. If a board flexes, crumbles, or stays cool and damp after extraction, it is not a drying candidate.
- Clean the remaining surfaces with the right method for the material. Wash hard surfaces with detergent and water, then apply a compatible antimicrobial or disinfectant only when the product label matches the surface and problem. Verify that soil, residue, and visible contamination are gone. A shiny wet surface is not the same as a clean surface; residue, odor, and film mean you need another pass.
- Set up drying with airflow and dehumidification. Use air movers to sweep across wet surfaces and a dehumidifier sized for the space, keeping doors arranged so air circulates through the affected area. Aim for stable conditions over 24–72 hours, not just a quick blast. Verify with a moisture meter and a hygrometer that both materials and air are trending down. If humidity stays high or readings plateau, your airflow or dehumidification is wrong.
- Keep checking moisture until the structure is dry enough to rebuild. Compare readings in damaged materials to unaffected reference materials nearby. Verify that moisture content has returned close to normal for the material and environment, not merely improved. If a wall cavity, baseplate, or subfloor still reads high after repeated drying, open it further and inspect for trapped water or a hidden source.
- Rebuild only after drying is verified. Replace insulation, drywall, flooring, trim, and finishes in the reverse order of removal, using materials suited to the space. Verify that the assembly is closed only after the source is fixed, materials are dry, and odor or staining is not returning. If the room smells musty again after rebuild, moisture was sealed in or the source was never truly solved.
One detail matters more than people think: drying is not the same as running a dehumidifier on the whole building forever. If you keep equipment running without measurable progress after 48 hours, look for a missed pocket of water, a hidden leak, or materials that need removal. On a simple clean-water loss, you should usually see meaningful improvement over a 24-hour window; on a heavily saturated assembly, the first 12 hours may only show the top layer moving.
The big mistake at this stage is spraying something fragrant on the problem and calling it done. Odor control is not restoration. If drywall is swollen, baseboard is blackened at the bottom, or carpet backing has separated, there is a material problem that no scent will fix.
What should I check before I close a wall or replace a floor?
Check moisture content, surface condition, odor, and hidden cavities before you close anything back up. If a wall, subfloor, or cabinet is still damp, rebuilding on top of it simply hides the problem.
Comparison readings are the best place to start. A moisture meter gives you a relative or direct reading depending on the model. Noninvasive meters are useful for scanning broad areas, while pin meters are better for direct readings in wood and drywall. I would use a meter to compare damaged material to a similar undamaged section in the same building. You are looking for a return toward normal, not a number that sounds low in isolation. A basement wall in winter, for example, can behave differently than an upstairs interior partition.
Check the substrate too, not just the finish. A carpet may feel dry while the pad beneath it is still wet. Drywall paint can be dry while the paper face and stud bay remain damp. Tile can survive a lot of water, but the backer board or adhesive beneath it may not. If the finish is the only thing you inspect, you are guessing.
Odor is the second check. Musty odor is not a scientific meter, but it is a useful warning sign. If a room smells earthy, sour, or stale after drying, something is still off. That may be an actual moisture problem, or it may be residue left from contaminated water. For that reason, I would not close the wall until the smell has a clear explanation.
A third check is the condition of the material edges. Cut drywall edges should be crisp, not crumbly. Wood should be firm, not soft at the base. Fasteners should not show active rust. Insulation should be dry enough to fluff, not clumped and matted. Sealed surfaces should be free of film, sludge, or staining that can transfer to a rag after cleaning.
One useful standard here is the idea of a “dry standard” for the building materials involved, not a universal percentage for every job. That matters because different materials dry at different rates and to different reference points. A 2-by-4 stud and a concrete slab do not share the same drying expectation. A generic article will often pretend they do.
If you are restoring a finished room, I would also check hidden spaces before reinstalling trim: behind baseboards, under toe kicks, inside vanities, behind door casings, and around HVAC returns. Those locations trap moisture because air movement is poor there. A simple 48-hour wait is not a substitute for checking those cavities directly.
When should cleanup stop, and what should happen instead?
Cleanup should stop and a different plan should start when the damage is bigger, dirtier, or more hidden than a simple drying job can handle. In those cases, forcing a DIY cleanup often makes the final bill higher, not lower.
Category 3 water is involved: This means sewage, floodwater, or another grossly contaminated source — do not treat it like a normal leak. Remove occupants from the area, avoid spreading contamination, and bring in qualified remediation with proper containment and disposal; consult a remediation professional and follow authoritative guidance such as the CDC’s flood cleanup advice or the EPA’s mold cleanup resources. The consequence of pretending it is “just water” is cross-contamination of finishes, tools, and air pathways.
The damage has reached HVAC ducts or the air handler: This means contamination can move through the system — do not keep running the system until it has been inspected and cleaned as needed. The consequence of continued operation is distribution of moisture and debris to other rooms.
Structural wood is soft, warped, or sagging: This means the framing may have lost integrity — do not close the wall or floor until a structural assessment is made. The consequence of covering it up is hidden failure, movement, and in some cases a delayed repair that affects load-bearing members.
The affected area is larger than a small room or keeps getting wet: This means the source is not truly fixed or the damage is beyond simple cleanup — do not keep adding fans to a moving target. The consequence is wasted drying time and trapped moisture behind finishes.
Mold has spread inside cavities, multiple rooms, or the HVAC system: This means the problem is no longer a surface-cleaning issue — do not rely on a wipe-down and paint. The consequence is recurrence, odor, and contaminated dust in adjacent spaces.
Electrical components were soaked: This means shock and fire hazards may still exist — do not energize the circuits until a qualified electrician has inspected them. The consequence of powering up too early can be damaged equipment, arcing, or injury.
The water source is still unknown: This means drying alone will fail — do not rebuild until the source is found. The consequence is that the same leak returns under the new finishes.
There is visible asbestos-containing material, lead paint disturbance, or other regulated material: This means the cleanup may have a legal and health hazard layered on top of the water damage — do not disturb it without the correct control measures. The consequence of casual removal is exposure and compliance trouble.
I am intentionally conservative here because the wrong threshold to ignore is worse than the wrong threshold to call for help. A professional is not needed for every wet carpet, but a professional is usually the right answer once the problem moves beyond one room, one source, and one layer of material.
The mistakes people make during restoration, and what those mistakes cost
The most expensive mistakes are the ones that look like progress. They remove visible mess, then leave the hidden problem in place.
-
They dry the surface and leave the cavity wet.
Consequence: the room looks fixed while the wall or floor keeps deteriorating.
Correct alternative: open the assembly far enough to expose wet insulation, baseplates, underlayment, or backing so drying can reach them. -
They use too much heat without enough dehumidification.
Consequence: warm air holds more water, but if that water has nowhere to go, the space stays humid and some materials can cup, crack, or distort.
Correct alternative: pair airflow with dehumidification and verify the humidity trend with a hygrometer. -
They leave porous materials in place because they “almost dried.”
Consequence: swollen drywall, pad, or particleboard can continue to off-gas odor and support growth.
Correct alternative: remove materials that have lost structure or stayed damp long enough to be contaminated. -
They paint or install new flooring before moisture is verified.
Consequence: trapped moisture can blister paint, lift adhesive, and stain new finishes.
Correct alternative: wait for comparative moisture readings to return near normal and confirm the area is stable for at least 24 hours. -
They use a scented cleaner instead of a true cleaning step.
Consequence: odor is masked, residue remains, and the underlying contamination is still there.
Correct alternative: clean with detergent and water first, then use a labeled antimicrobial or disinfectant only when appropriate. -
They assume all water damage is the same.
Consequence: clean supply-line leaks are handled like sewer backups, or contaminated water is handled like a dish spill.
Correct alternative: classify the source and the materials before choosing the cleanup method.
A smaller but common mistake is drying only the area that feels wet. Water follows framing, seams, and gravity. It can travel under flooring, behind trim, and into adjacent rooms. If the visible wet spot is at one end of a wall, the damage can be several feet wider than the stain.
I also see people rush to reinstall trim, cabinets, or baseboards because the room smells better after 24 hours. Smell is not a moisture meter. A room can smell clean and still be too wet for closure. That’s the trap.
How do restoration methods change for different materials and water sources?
They change a lot, and the material matters as much as the water source. A wood subfloor, a concrete slab, and a gypsum wallboard assembly do not respond the same way to the same incident.
Drywall is the simplest example. Once gypsum board has wicked water into the paper face and the core has softened, the cut line usually needs to be well above the visible water mark.